
Hyderabadi Veg Dum Biryani
Hey there! Finally, I made biryani. As I'm an egg-tarian, I have not tasted the 'original' versions of biryani like chicken and mutton. So, to compensate, I had to eat a Veg Biryani (or for that matter, an Egg Biryani). My mom had cooked Maka Biryani (Corn Biryani) and I loved the taste so very much, that I had to make an authentic one, very soon! I searched for the recipes of Veg Biryani on Pinterest, and to my surprise, I found this delicious one*. I knew by the photo of it that I'd found my soulmate (all right, just kidding!).

Preparation Time: 1 Hour


8. Take warm milk and soak few strands of saffron. Keep aside.
9. Now start preparing the biryani.

10. In a bigger frying pan, put oil and all the Whole Spices. Fry for few minutes.
11. Add ginger-garlic paste and fry more.

12. Add in the chopped vegetables and fry.
13. Keep a low flame and cover the pan for few minutes. (This will help in boiling the vegetables.)
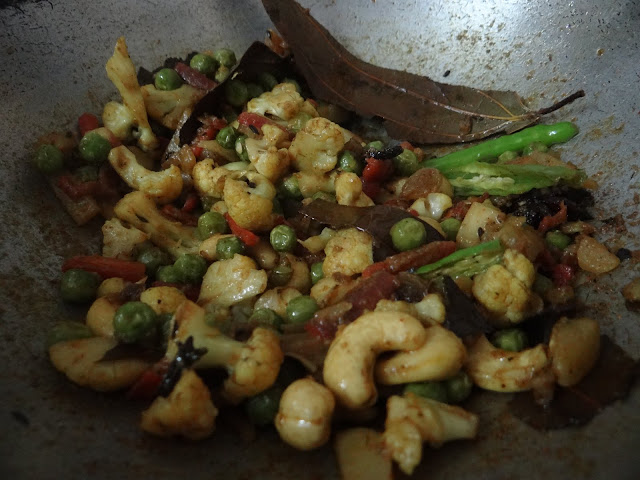
14. Slit open the green chilies and add.
15. Add red chili powder, turmeric, biryani masala (we get in stores), salt, HALF of the chopped mint leaves.
16. Add in cashews and raisins. Mix well.
17. Add HALF cup of yogurt and mix until the water from the yogurt evaporates.
18. Fry the vegetable mixture until the vegetables are properly boiled, but not mushy; they should retain their original shape.
19. Keep the vegetable mixture aside.

20. It's now time to layer.
21. In a vessel (I took a pressure cooker), add HALF of the vegetable mixture.
22. Add HALF of the fried onions.
23. Add remaining yogurt and mix all the three layers (vegetable, onions, and yogurt) together. Check for salt.
24. Add HALF of the layer of rice. Make a thicker layer.
25. Add few cashews and raisins.
26. Add a layer of the remaining vegetable mixture, and top it with the remaining fried onions.
27. Add the remaining rice and top it with cashews, raisins, coriander leaves, and the remaining mint leaves.
28. Pour in the saffron flavoured warm milk on top of it.
29. Keep the vessel on stove, with a low flame. Cover it with a damp cloth.
30. Keep a lid on it and on top of it, keep a weight.
31. Wait for 10 minutes.

32. Serve the hot biryani in layers with raita, and enjoy!

Preparation Time: 1 Hour
Cooking Time: 2 Hours
Serves: 3 to 4
Veg/Non Veg: Veg
Ingredients:
- For Cooking Rice:
- Basmati Rice - 2 Cups
- Salt
- Cumin Seeds/Jeera
- Oil
- For Biryani:
- Vegetables Chopped (Cauliflower, Green Peas, Carrot, Potatoes) - 4 Cups
- Green Chilies - 3
- Ginger Garlic Paste
- Biryani Masala
- Red Chili Powder
- Turmeric
- Yogurt - 1 Cup
- Whole Spices:
- Green Cardamom - 5
- Black Cardamom - 2
- Star Anise - 1
- Cloves - 7
- Cinnamon - 1.5 Inches
- Bay Leaves - 2
- Cumin Seeds/Jeera
- Other:
- Onions - 3 Medium
- Saffron
- Warm Milk - 1 Cup
- Mint Leaves - 1/2 Cup
- Cashews
- Raisins
- Coriander Leaves - 1/2 Cup
- Water - 3.5 Cups
Steps:
1. Take two cups of Basmati Rice and rinse it until clean. Soak it in water for an hour.
2. Meanwhile, chop all the vegetables until you know they're sufficient for the rice. Take four cups approximately.

3. Chop 3 medium sized onions, lengthwise.

4. Take a small frying pan, and fry the onions using oil, until they turn golden brown. Keep them aside on a tissue, if you're health conscious.

5. Next, take a big vessel, and put in 3.5 cups of water. Add cumin seeds, salt, and oil as per your preference.

6. Boil the water, and as soon as it starts boiling, add Basmati rice.
7. Continue the boiling until the rice is cooked partially. See to it that the rice does not break when touched. (It should not be mushy.)

9. Now start preparing the biryani.

10. In a bigger frying pan, put oil and all the Whole Spices. Fry for few minutes.
11. Add ginger-garlic paste and fry more.

12. Add in the chopped vegetables and fry.
13. Keep a low flame and cover the pan for few minutes. (This will help in boiling the vegetables.)

14. Slit open the green chilies and add.
15. Add red chili powder, turmeric, biryani masala (we get in stores), salt, HALF of the chopped mint leaves.
16. Add in cashews and raisins. Mix well.
17. Add HALF cup of yogurt and mix until the water from the yogurt evaporates.
18. Fry the vegetable mixture until the vegetables are properly boiled, but not mushy; they should retain their original shape.
19. Keep the vegetable mixture aside.

20. It's now time to layer.
21. In a vessel (I took a pressure cooker), add HALF of the vegetable mixture.
22. Add HALF of the fried onions.
23. Add remaining yogurt and mix all the three layers (vegetable, onions, and yogurt) together. Check for salt.
24. Add HALF of the layer of rice. Make a thicker layer.
25. Add few cashews and raisins.
26. Add a layer of the remaining vegetable mixture, and top it with the remaining fried onions.
27. Add the remaining rice and top it with cashews, raisins, coriander leaves, and the remaining mint leaves.
28. Pour in the saffron flavoured warm milk on top of it.
29. Keep the vessel on stove, with a low flame. Cover it with a damp cloth.
30. Keep a lid on it and on top of it, keep a weight.
31. Wait for 10 minutes.

32. Serve the hot biryani in layers with raita, and enjoy!
Note: I had followed the amount of ingredients similar to what was mentioned in the original recipe. Due to this, the gravy in the biryani was too less as compared to the rice. I had to keep 1/4th amount of the plain rice aside, as it was too heavy for the small amount of gravy. So, follow the amount of ingredients I have mentioned on TPCG, if you want a good amount of gravy.
Have you ever tried making biryani?
xoxo
*Nupur. (2013). Hyderabadi Vegetable Dum Biryani – On stove top and oven, both versions explained. Available: http://theveggieindian.com/2013/11/hyderabadi-vegetable-dum-biryani-on-stove-top-and-oven-both-versions-explained.html. Last accessed 11th Dec 2015.


0 comments